The Flitch Book
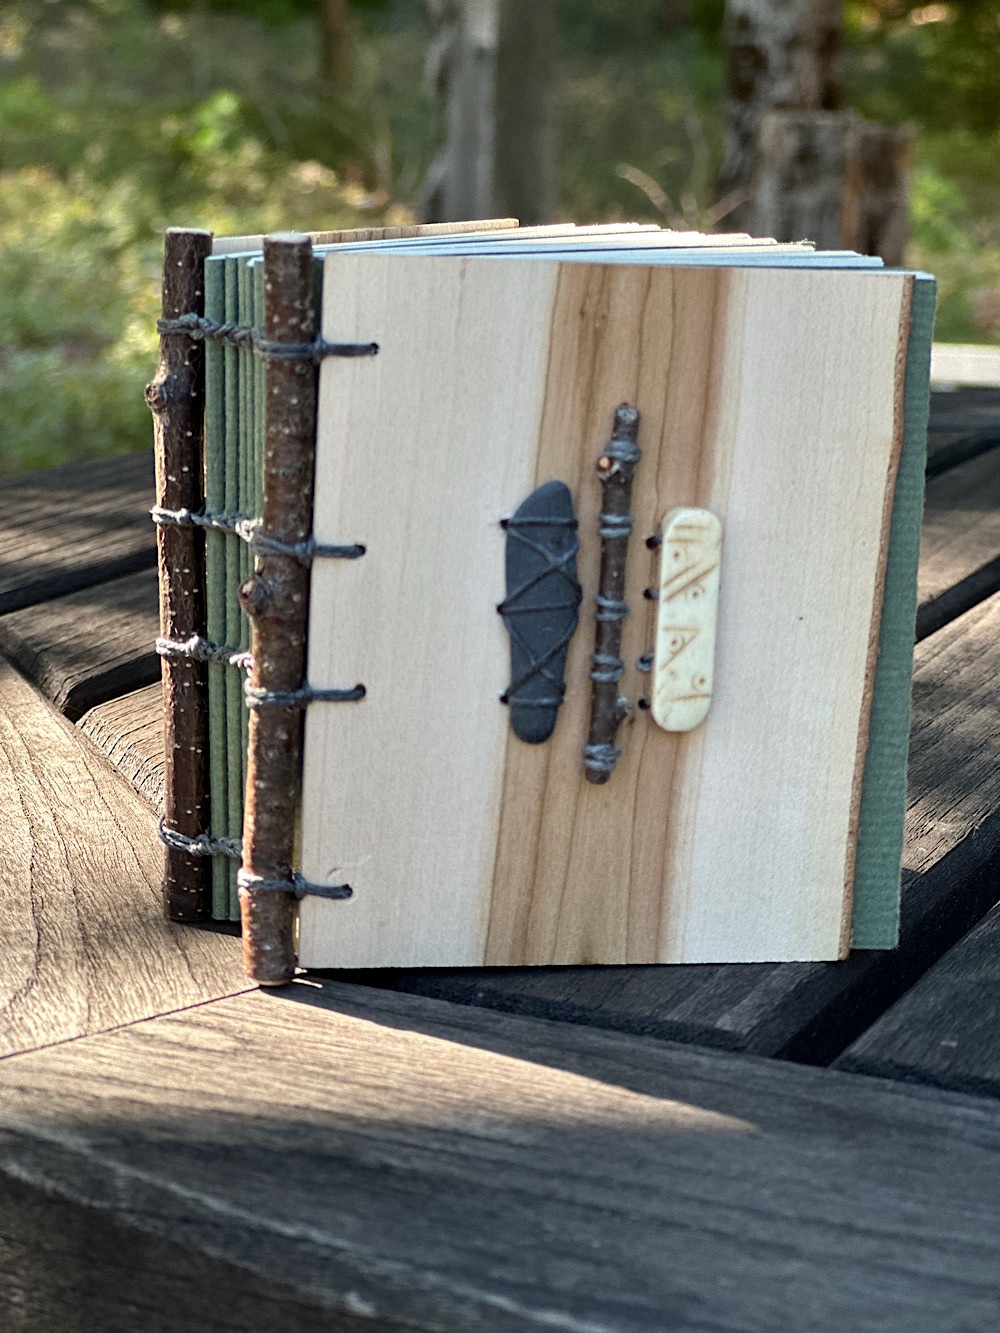
This week I took two bookmaking workshops with Margo Klass, our very esteemed and talented local maker of handmade books (only in the summer; in the winter, she lives in Alaska!). I also volunteered for two four-hour shifts making window inserts to help keep people cozy during the long cold winter when heating becomes so expensive. All in all, it was a busy hectic week. Today I’m chilling out and taking some time to catch up.
I just wanted to reflect a little bit on this book, which is so special. The covers are known as “flitches” – cuts of wood split from a log. These are made from choke cherry wood from Alaska and are very thin and finely finished. The tall sticks at the spine are birch twigs from Maine. “Maine’s birch twigs are straighter than Alaska’s.” The class had many steps, from creating the text block, to adding ornamentation to the front cover, to sewing the coptic binding that assembles the book. We practiced a special method for attaching the sticks at the edge of the spine as steps in the binding.
Margo had a trayful of bone decorations, another tray of pebbles, and a jar of sticks to choose from for ornamentation. I had no trouble choosing the bone piece to use. It’s the lozenge-shaped piece at right, with runelike designs etched into the top and holes drilled through the sides. I took a lot of time choosing the pebble though. Reviewing the design, Margo suggested the addition of a stick. Sounds so simple, right? I am not confident in my ability to design on the fly, but simplicity always works for me. I was happy with this very simple layout of three elements.
Attaching the ornaments was very difficult. First I epoxied down the pebble and the bone. Then I had to drill holes, a new skill for me. I also had to drill holes for the stitching along the side. Yikes! Luckily, my inexpert holes did not split the covers or mar the wood horribly and the stitching worked out. I stitched the pebble, then the bone, lastly the stick. If I were to do it again, I’d attach the bone piece first before gluing on the pebble. That narrow space between them was very challenging to manipulate a needle and thread through. Stitching on the stick was so fiddly, I still can’t believe it’s done. Sometimes I had to abandon the needle completely and just try to poke the thread through to the right place.
Attaching the side sticks to the cover was another exercise in unknowns. I think I was aided in the technique by my knitting, believe it or not. The attachment process involves wrapping thread to get those sticks to stay in place next to the covers. And knitting is basically different ways of wrapping yarn around itself to make a certain result. The coptic binding is something I haven’t done in years, but it came back to me quickly enough. Some of the braids look better than others.
I’m amazed that I could make this book in a one day class. It’s so special that I wish I had time to perfect the various parts. Missteps: the cover was drilled upside down. Too much paper is showing at the fore edge; I should have made the text block narrower. The pebble’s thread is a different color from the thread used for the other pieces. And the binding could be neater. But all in all, the book is a treasure and I’m so grateful to Margo for her generous and patient sharing of it with us.